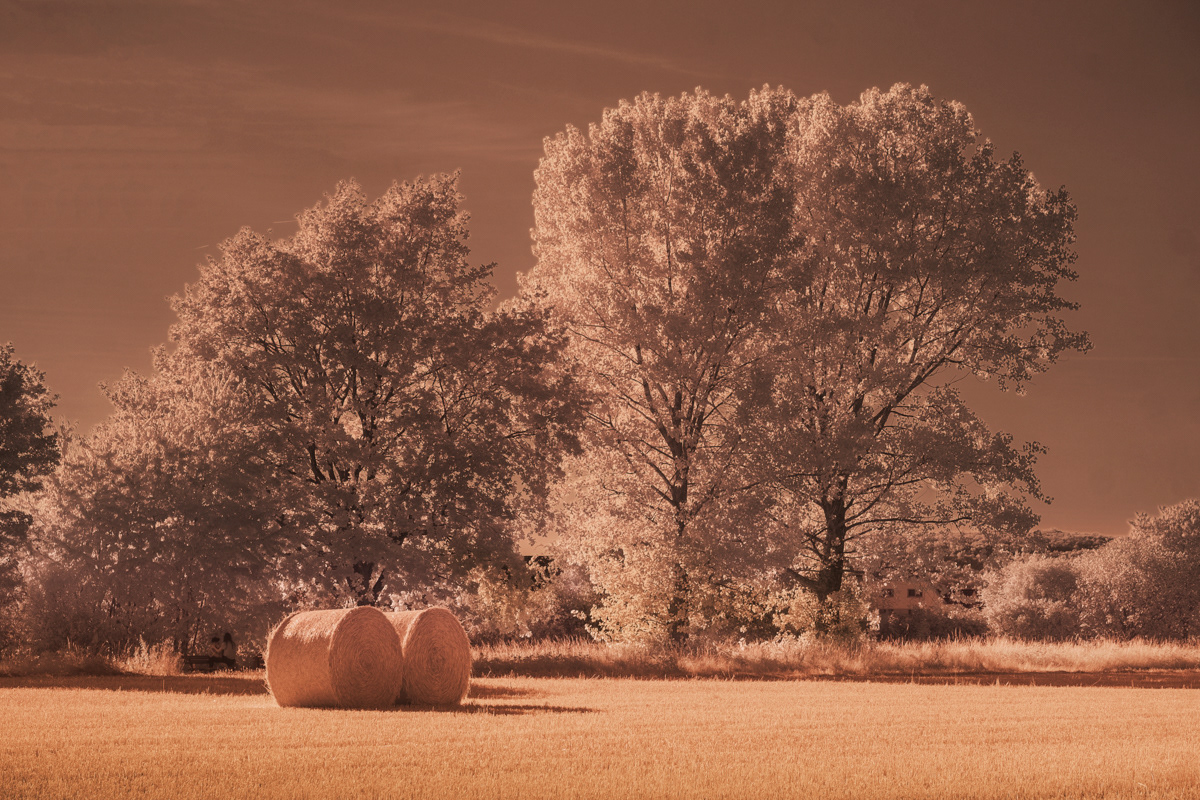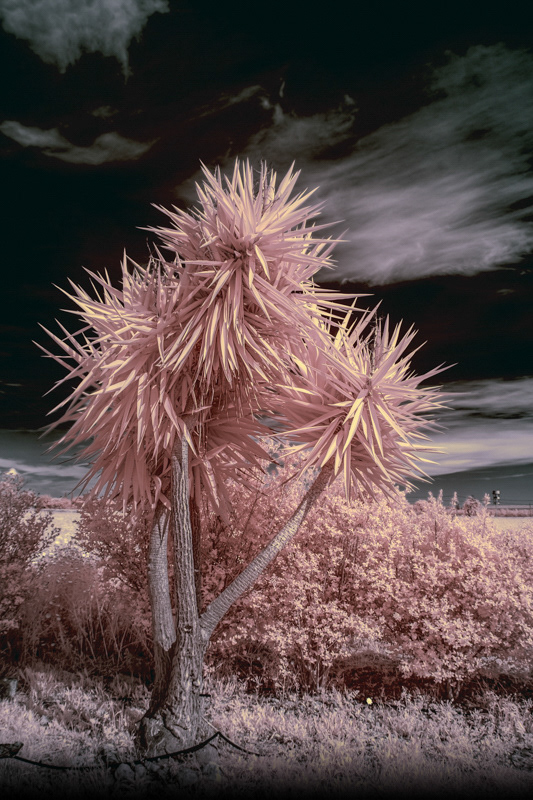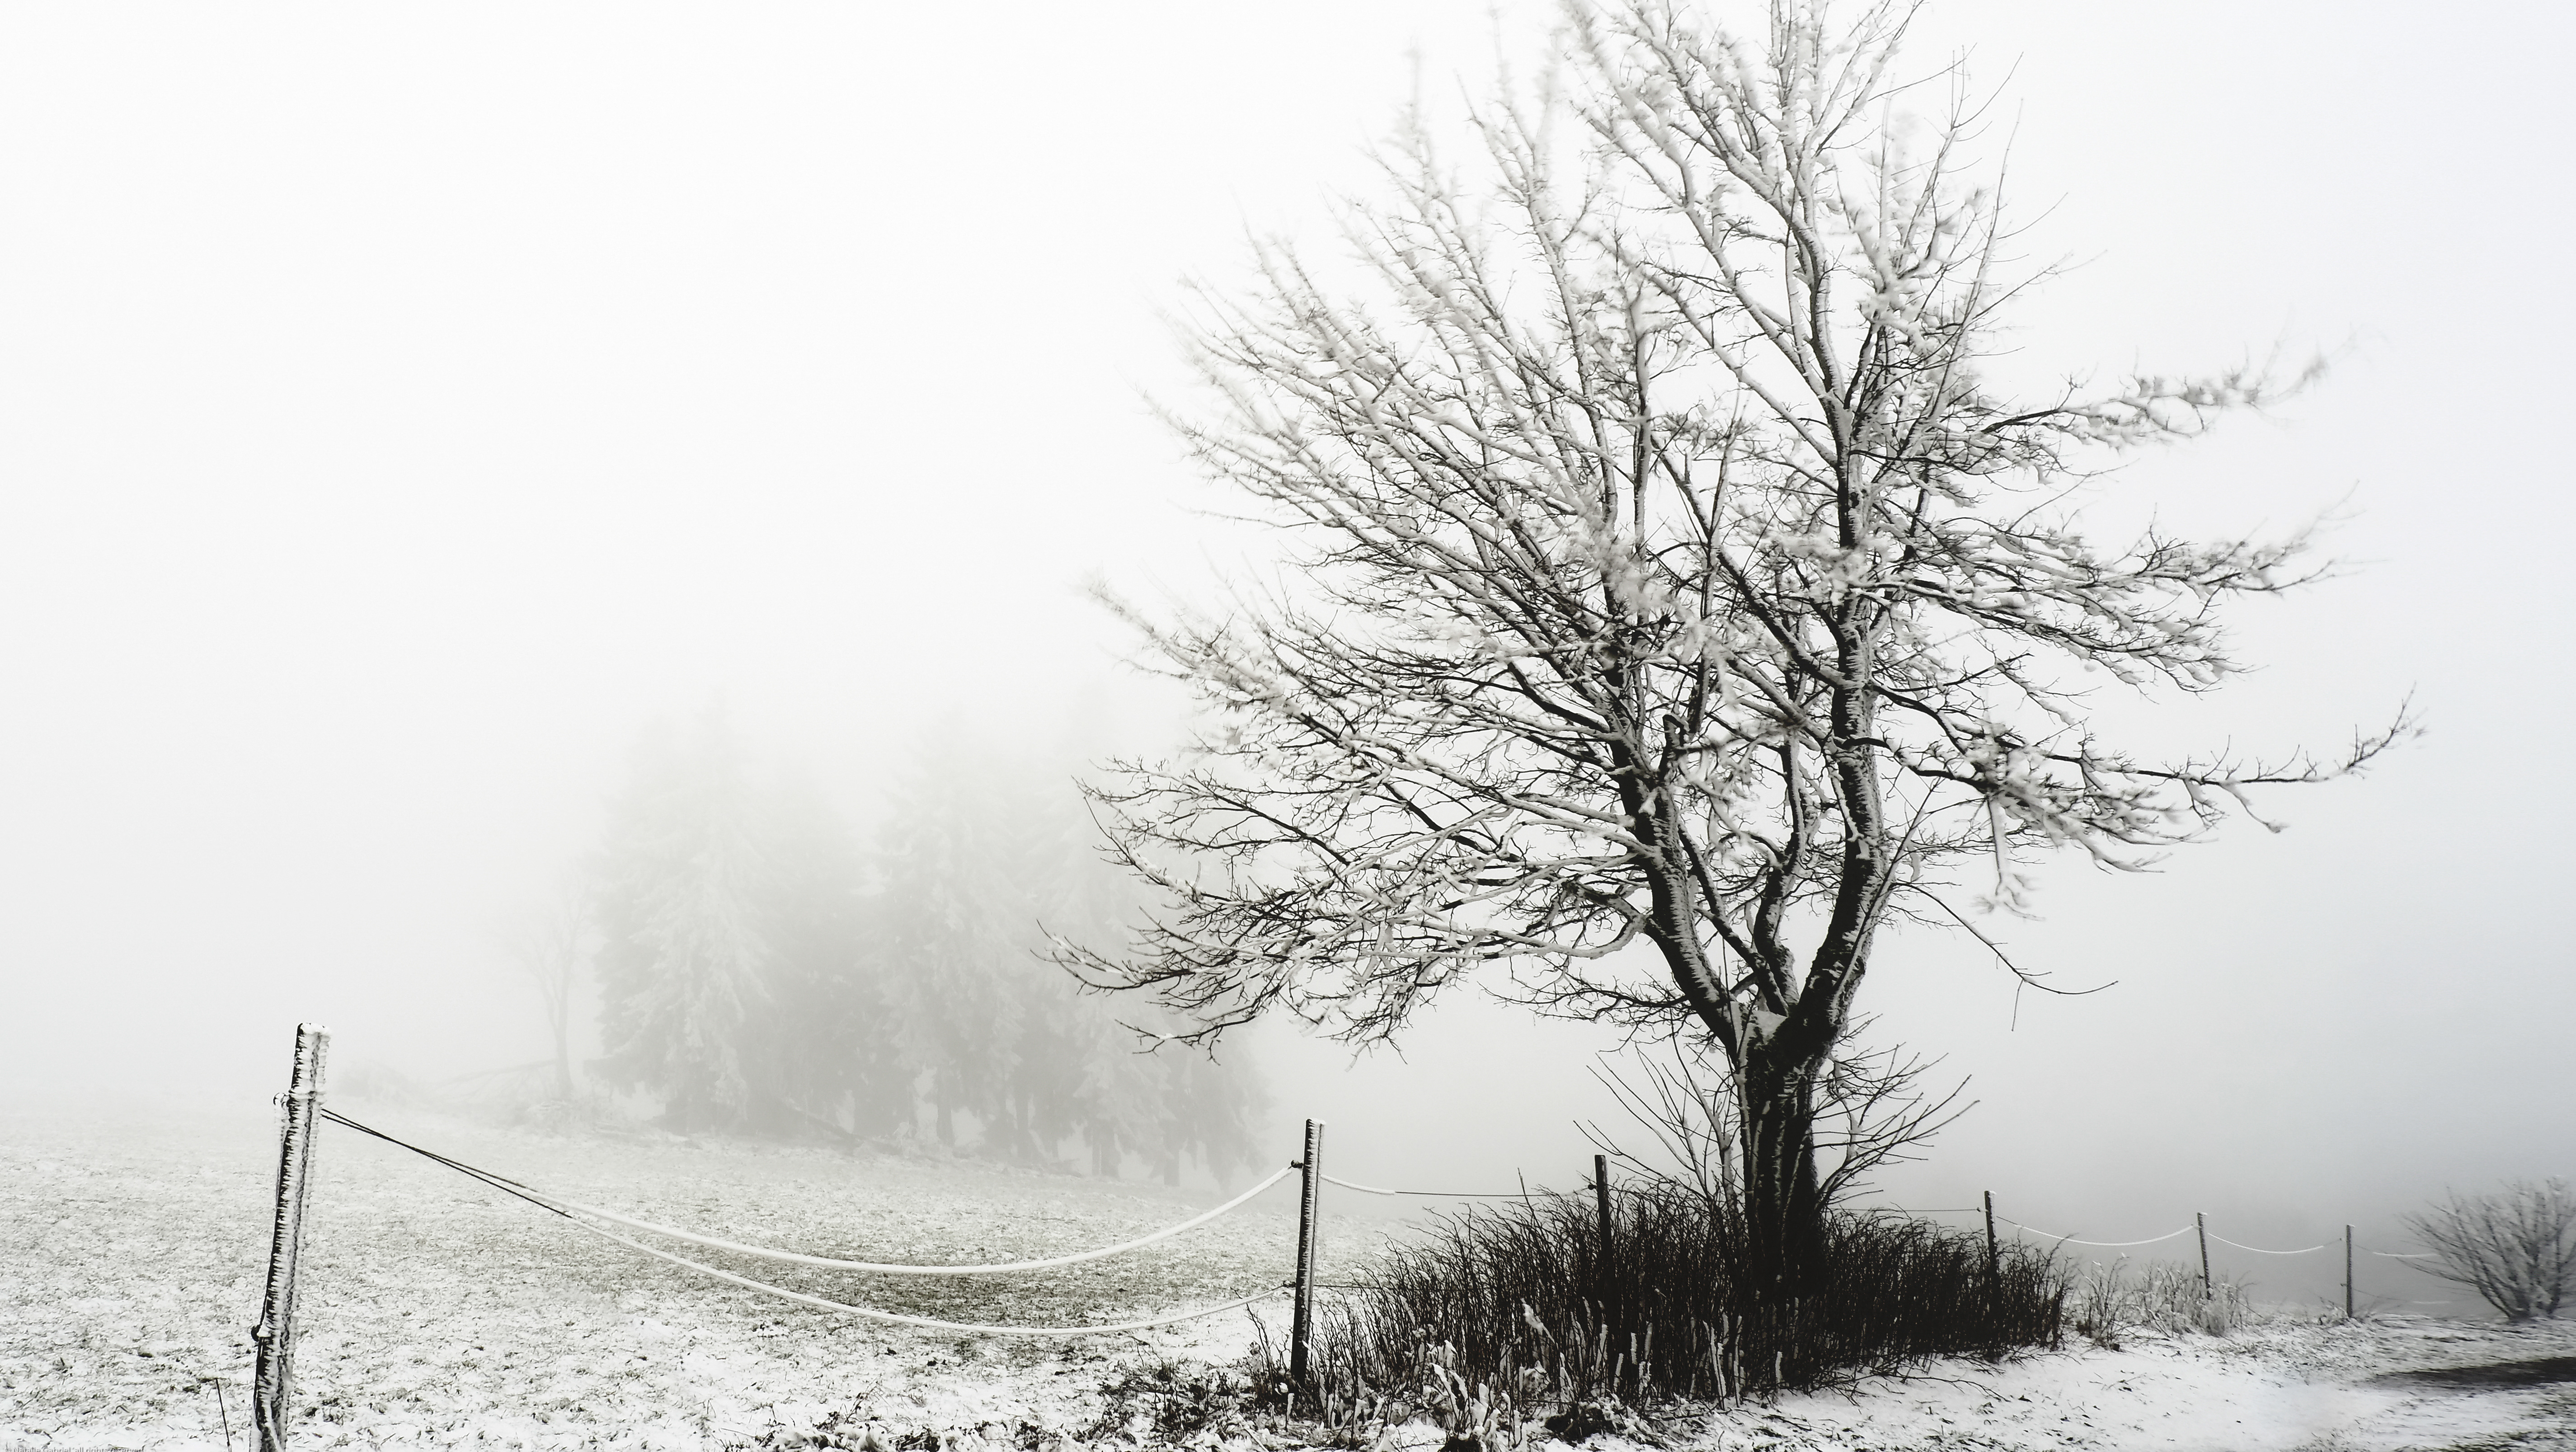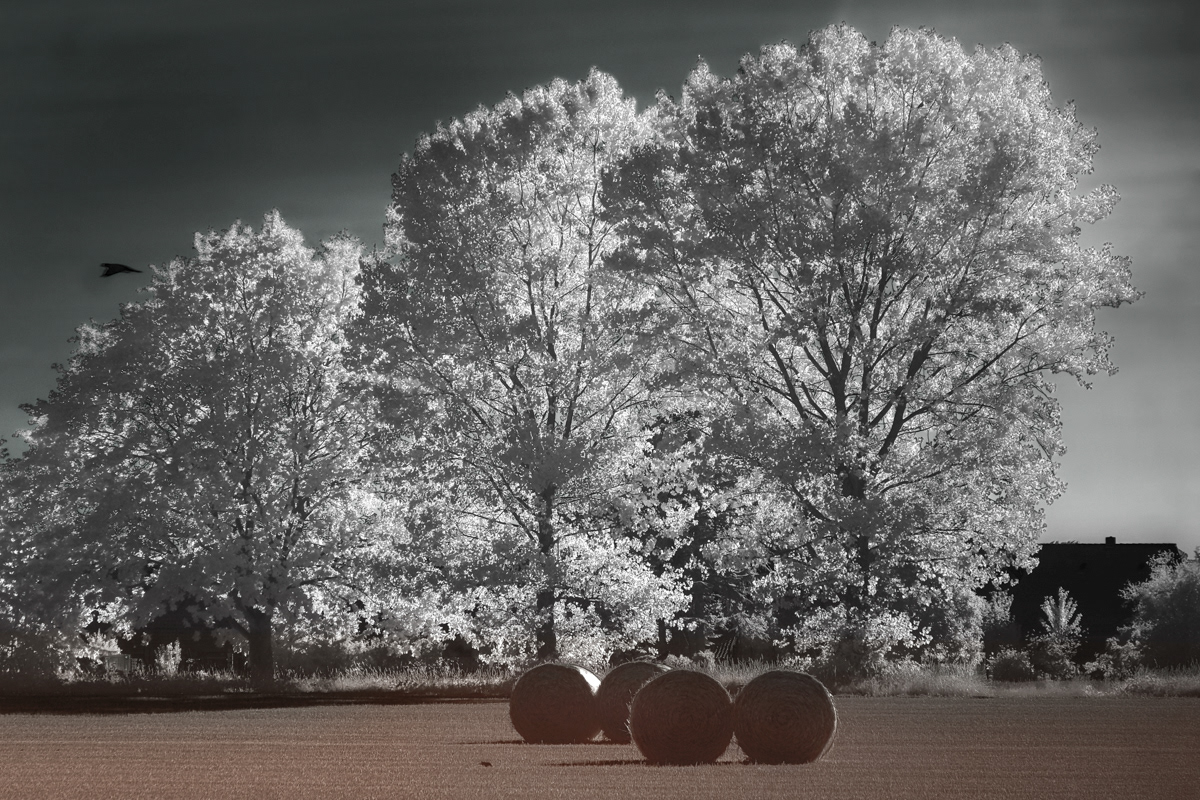
The most interesting in the infrared range looks landscapes. This is due to the fact that, in fact, we fix the ability of objects not to radiate, but to absorb infrared waves. For example, the sky absorbs them in huge numbers and will go dark and black in the picture, the green of the trees, on the contrary, reflects the rays and in the picture will look white, like those covered with frost on a frosty day.
You can check, if your camera is suitable for infrared shooting. Take a remote control from a TV and take some shoots in full darkness, holding the remote control towards the lens with any button pressed. If a bright dot appears on the captured frames, it means that your camera’s filter transmits infrared rays. So, you can just put an infrared filter on the lens. In this case you will have to shoot at slow shutter speeds and therefore a tripod will be required.
Otherwise it is possible to use a separate second hand camera, which will be remade with removal of the Low Pass filter. In this case you can take a shoot with high speed as well.
It is worth experimenting with various white balance parameters, analyzing the result. In addition, it is worth putting the camera into manual focus mode, since autofocus can get wrong because of the filter.

The traditional way to develop the infrared photos is to use Channel Mixer in Photoshop (Image - Adjustments - Channel Mixer)
Select the red channel and adjust the number of Red there from 100 to 0, and the number of Blue from 0 to 100. Than select the blue channel and adjust the number of Blue there from 100 to 0 and the number of Red from 0 to 100
To get different effects, you can lightly change the adjusting and also work with Hue / Saturation (Image - Adjustments - Hue / Saturation)
Such a traditional way of working with photos nevertheless leads to some loosing of quality and the appearance of noise, especially in the sky area.
That's why based on my personal experience, I find the better way to safe the quality of photos, working directly with RAW files, using Camera RAW or Lightroom, working there with Temperature, Tint, Vibrance / Saturation and HSL / Color adjustments. After you can slightly change the settings in Photoshop, if necessary.
That's why based on my personal experience, I find the better way to safe the quality of photos, working directly with RAW files, using Camera RAW or Lightroom, working there with Temperature, Tint, Vibrance / Saturation and HSL / Color adjustments. After you can slightly change the settings in Photoshop, if necessary.